Setting up Customer Regions
Once the region assignment configuration setting is set as desired (to manual selection or by ZIP code), staff can create regions to be associated with Customer Records.
Manual Selection
-
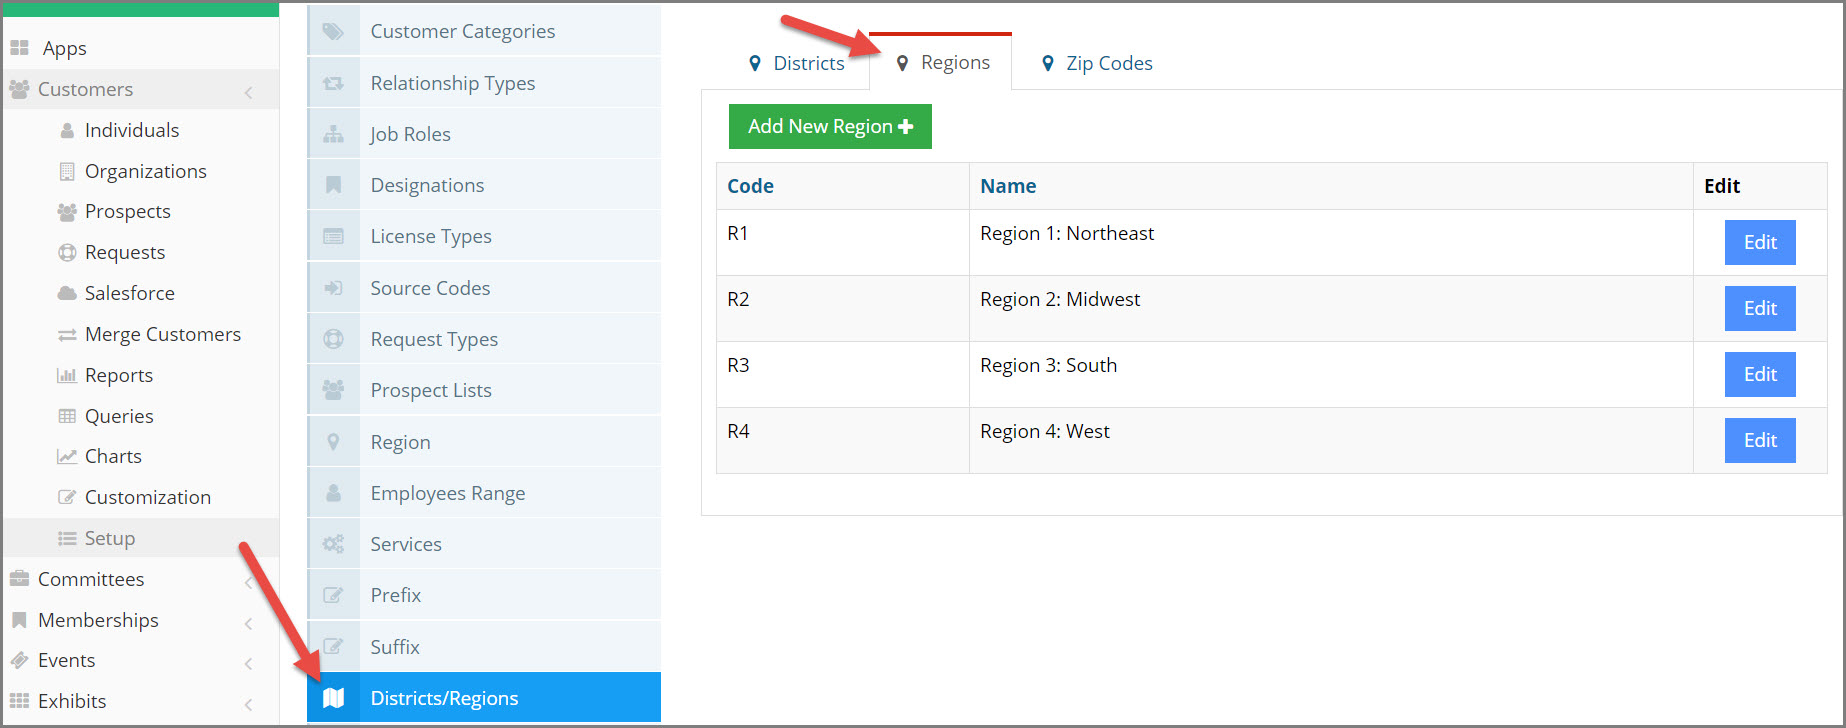
Click the Customers App.
-
Select the Setup Feature.
-
Choose the Districts/Regions menu option.
-
Click the Regions tab. Add as many new regions as necessary by clicking the Add New Region button.
For clients using manual region assignment, regions can be manually assigned on the Customer Record.
Selection by ZIP Code
-
Under Customers, Setup, and Districts/Regions, click the ZIP Codes tab.
-
Select the Regions by ZIP Code tab.
-
Click the Add New ZIP Code by Region button.
-
In the Add Region ZIP Code window, enter the ZIP Code range to be associated with this region.
Tip: ZIP codes must be entered as a range (e.g., 22124-23002) or in a comma-separated list with no spaces (e.g., 22124,23002).
-
Choose the Region.
-
Click Save.
-
Note: If regions are set to auto-apply, the auto-applied region can be manually changed by editing the customer record.